Last Updated on April 12, 2023 by smiling-coffee-snob
The Hario V60 is one of the most popular brewing methods out there, but it’s also one of the more challenging. The shape gives you an incredible amount of control over the entire brewing process, but if you make a mistake you’ll have to suffer through a disappointing cup of coffee.
When I first started using the V60 there were only a few styles and brewing methods, but over the last few years there’s been a staggering amount of change. There are now multiple styles to choose from and just as many brewing methods. Even the filter paper market has grown to include multiple brands and styles of paper filters.
All these options can be overwhelming—especially if you’re new to the V60. So, I created this V60 guide to help you understand your options and make the most of your brewer.
(Disclaimer: These are my personal recommendations and nothing is sponsored. However, the links in this post are affiliate links and if you buy something I’ll receive a small commission at no extra cost to you).
Hario V60 Guide: What is the V60?

The V60 is a cone shaped brewer that’s manufactured by Hario, a hundred-year-old Japanese glass company that also makes household products. The name refers to the V-shape of the cone, which is at a 60 degree angle.
Besides the shape, there are spiral ridges inside that allow air to circulate between the paper and the brewer. There is also a single large hole in the center that gives you a great deal of control over the speed of the brewing process.
Hario originally designed the V60 as a convenient alternative to the cloth filters traditionally used in Japan, but it’s grown into one of the most popular brewers around the world. As specialty coffee grew in popularity, the Kalita Wave has reduced the V60’s dominance. Now, there seems to be a never-ending debate over which one is better.
What’s the best version of the Hario V60?
The V60 line of coffee brewers has grown into a huge lineup of various sizes and materials. When it comes to choosing one, it’s mostly going to be about your preference, but there are some practical considerations, too.
If you don’t have a brewer yet, I recommend this V60 starter kit, which includes a plastic v60, glass carafe, and paper filters.
Size
The first consideration is going to be the size. The Hario V60 is available in three different sizes to allow for different amounts of coffee. It’s a straightforward numbered system fro 1-3.
Hario describes, the 01 size as holding 1-2 cups, the 02 size as 1-4 cups and the 03 size as 1-6 cups. It’s not completely clear how they define a cup, but I’ve found that it’s 5oz. So, I recommend you use the 01 for a maximum of 10oz, the 02 for 20oz and the 03 for 30oz.
I think that the 02 size is best for most people and 300-500g of water is the ideal amount (that’s about 10-17oz of coffee after accounting for the water absorbed by the grounds).
(If you’re looking to brew a larger batch, I’ve written a full article on brewing coffee for large groups).
Materials
When it comes to materials, the options are glass, ceramic, metal, copper and plastic. While it may seem counterintuitive, the most practical option is the basic plastic dripper. Since it doesn’t retain heat, it keeps the water temperature more stable when brewing.With that being said, other materials have a lot of other advantages and can hold heat well if you preheat them.
Since Hario is a glassmaker first, they make some wonderful glass drippers, but I’d guess that the ceramic versions are the most popular. The ceramic is made in Japan using traditional methods dating back hundreds of years. Metal versions are also available, including copper, which is great for holding in heat.
So, to summarize all that, plastic is the most practical option and does a great job maintaining heat in the water. However, I still like the stainless steel version and I also use the ceramic Kasuya model (I’ll talk more about it below).
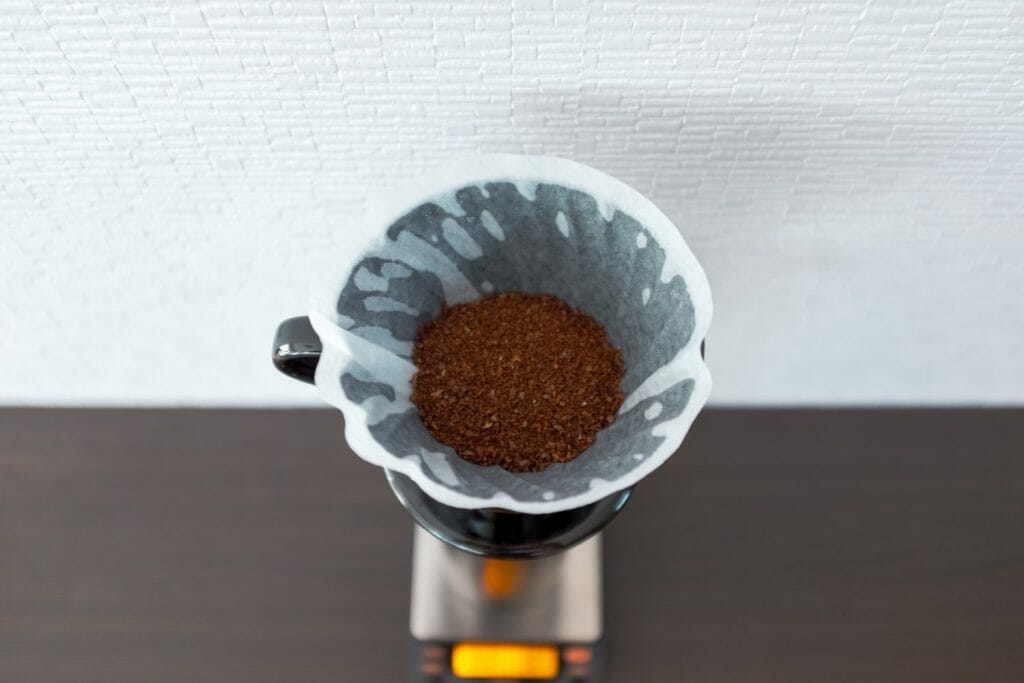
Hario V60 guide: All filters are not the same

Another interesting quirk with the Hario V60 is the wide range of filter paper available and the debate over which one to use. James Hoffmann made a detailed video a while back comparing a number of different V60 filter papers and they were dramatically different in taste and brew time.
The issue appears to be that Hario started using a second factory in Europe to produce some of their filter paper. These filter’s drain much slower than the original ones from Japan. You can tell the difference by the packaging. The original ones are untabbed and come in a cardboard box while the new ones are tabbed and wrapped in plastic.
If that’s not confusing enough for you, the company Cafec has become the new favorite of many V60 brewers (including me). But wait, there’s more…
Cafec has expanded their original filter line by adding three new options. One for light roasts, one for medium roasts and another for dark roasts. While this probably sounds like a gimmick, most people that have tried them like them. Personally, I use the light roast filters, but I recommend you either use the ones for your preferred roast or go with the originals.
(I recently noticed that Cafec has updated their filter paper and the light roast filters are even thicker and slower now. This makes the 4: 6 method, which I describe below, work great with the standard V60, but it makes all the other methods a lot more difficult).
Recommended equipment for brewing with the V60
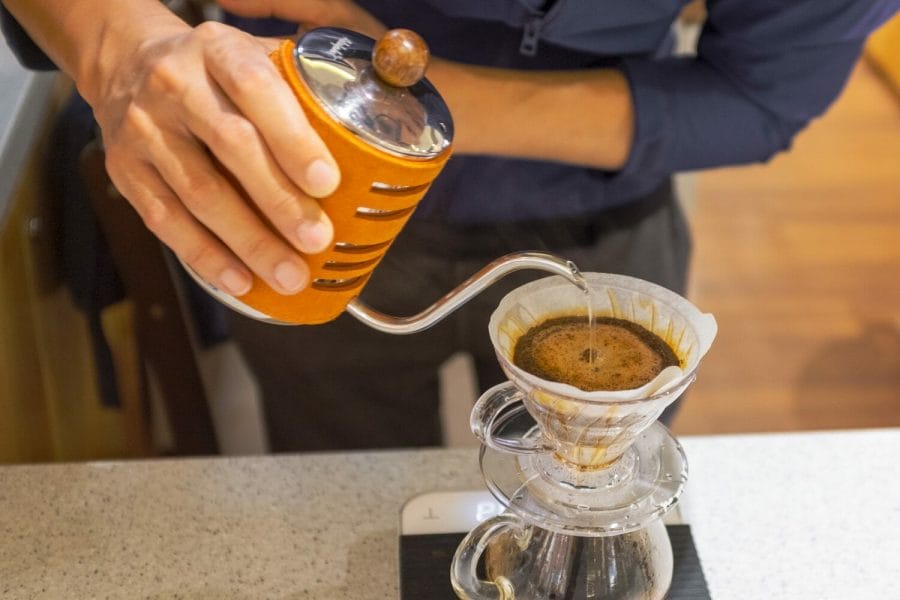
As I’ve mentioned in other pour over coffee articles, the V60 works best with a scale and gooseneck kettle. The kettle is especially important since most brewing techniques require a precise pour.
However, it’s not impossible to brew with a standard kettle—just more difficult. It also depends on the method you use. If you want to try using the V60 without a gooseneck kettle I recommend you use the Lance Hendricks version I show below.
As for the scale, it just makes measuring more accurate. Most of the brewing techniques I mention below require specific amounts of water for each pour, which is much more difficult without a scale. But, again it’s possible without one just less accurate.
Top 5 Hario V60 brewing techniques
Most of the V60 brewing methods have their merits, but I’ve found that these five get the best results. They are also fairly different from each other in terms of grind size, technique and simplicity.
James Hoffmann method
If you read my article about coffee books, you already know James Hoffmann as the author of The World Atlas of Coffee. Besides the book he has built one of the most popular coffee YouTube channels around and I highly suggest you check it out.
His Ultimate V60 method is one of the top guides out there right now and I think it’s the perfect place to start. The most distinctive feature of his method is a finer grind and higher water temperature. He recommends using water just off the boil unless you’re brewing with a dark roast, which should be more like 88 C (190 F).
Basic instructions:
- Grind 30g of coffee to a medium-fine level
- Boil water and rinse paper filter to remove paper taste, then discard water
- Add ground coffee, level the bed, then make a small hole in the center
- Start timer and pour 2 X water (60g) to saturate the coffee
- Swirl coffee and wait 30-45 seconds to bloom (release the CO2 from coffee)
- Quickly pour water until you reach 300g in 30 seconds (60% of total water)
- Add remaining water to reach 500g by 1:45
- Stir once clockwise and once counterclockwise
- At about 2 minutes give it one last swirl and let it drain
Generally, your coffee should finish draining within 3:30 minutes, but it will depend on the coffee. James recommends using taste as the final judge, so if it’s longer or shorter but still tastes good that’s totally fine.
Lance Hendricks method
One of the more recent methods is from Lance Hendricks, a barista at the famous Onyx Coffee Lab. It’s one of the easier methods and I’ve gotten great results with it. It’s also the best method if you don’t have a gooseneck kettle.
The main difference from the James Hoffmann method is that it uses multiple pours, rather than three. It also does a center pour, rather than spiraling from the center out—which is why it’s easier to do without a gooseneck kettle.
Basic instructions:
- Grind 20g coffee to a medium-fine level
- Boil water and rinse filter to remove paper taste, then discard water
- Add ground coffee and use a chopstick to distribute and make small hole in the center (using your finger tends to pack down coffee)
- Start timer and pour 50g of water and swirl
- At 30s pour another 50g of water and swirl
- At 1 minute pour 120g of water and swirl
- At 1:30 pour the last 120g of water and swirl
Generally, the water should finish draining within 3-4 minutes, but it will really depend on your coffee and grind size. You can increase the number of pours to five if you want to increase the extraction. Five pours often works better with lighter roasted coffees.
Tetsu Kasuya’s 4: 6 method
One of the most unique methods out there is the 4: 6 method by champion barista Tetsu Kasuya. While most methods use a a relatively fine grind, this one uses a very coarse grind. The special Kasuya version of the V60 works best with this method since it slows down the brew time, but I’ve recently found that the Cafec light roast filters work well, too.
The 4:6 method divides your brew into two parts, which allow you to customize it to your desired taste. The first 40% determines the balance between sweetness and acidity, while the last 60% determines the strength.
There will be 3-5 total pours, depending on your preferences. The first two pours represent the 40% that determines sweetness and acidity. If the first pour is smaller than the second, it will emphasize sweetness. If both pours are equal, it will bring out the acidity. The final 60% will be 1-3 pours, depending on how strong you want it. 3 will give you the most strength and is the method Tetsu uses for the demonstration.
Basic instructions:
- Grind 20g of coffee to a coarse level
- Heat water to around 94C (200F), rinse paper, then discard water
- Add ground coffee and shake to flatten the coffee bed
- Start timer and pour 50g of water to cover the grounds
- At 45s pour 70g of water
- At 1:30 pour 60g of water
- At 2:15 pour 60g of water
- At 3 minutes pour the last 60g of water
Ideally, the coffee should drain completely between each pour and it should finish draining at 3:30-4 minutes. Keep in mind, this is just a general example that Tetsu Kasuya recommends. You can adjust the amount and number of pours according to the principles mentioned in the introduction.
Osmotic flow method
The Japanese company, Cafec, which I mentioned as an alternative to Hario’s filters, has coined the term “osmotic flow” for a brew method common in Japan. Like the 4:6 method, it uses a coarse grind, but besides that it’s fairly unique from the other methods.
It’s the most slow and methodical of all the methods, but can get great results. However, it requires a gooseneck kettle and a slow, almost continuous pour. The basic idea is to slowly pour in a coin-sized section of the center and expand toward the outer section without ever touching the wall of the brewer.
The coarse grind size, minimal agitation of the grounds and long brew time can bring out the best of your coffee without the bitterness—ideally, at least. Some people think this works best for darker roasted coffees, but I think you can get good results with a wide range of coffee beans.
Basic instructions:
- Grind 20g of coffee coarsely
- Heat water to around 94C (200F)
- They don’t rinse the paper filter, but I recommend you rinse it, then discard rinse water
- Slowly add just enough water to wet the grounds by starting in the center and slowly moving outward in circles but don’t touch the wall
- At 30s start to slowly add water to the center in small pours
- You will see it slowly bubble up from the center like the head of a mushroom
- When the mushroom rises, stop and wait for it go down before pouring again
- Once you reach 100g slowly make circles at the outer edge of the head
- Stay within the center area to keep the thick layer off coffee around the outside near the wall
They don’t give a final time, but generally it can be 3-5 minutes or even longer. Don’t get discouraged if you struggle with this method, as it’s based off of the original Japanese nel drip method which is very challenging.
I also recommend you watch a similar video by The Coffee Chronicler. He gives a much easier to understand explanation of the process and an easier way to do it.
For more about the nel drip method and Japanese coffee in general I recommend you read the Blue Bottle Coffee book. They have been very influenced by Japanese coffee culture and give more detail about it. If you really want to geek out on Japanese coffee, I recommend Coffee Life in Japan.
Tales coffee method
A Vancouver based coffee brand caught my attention recently for their unique view of brewing with the V60. The reason it stood out to me is that’s it’s pretty similar to a new method of brewing by Tetsu Kasuya (who created the 4:6 method) that I saw in an interview with him.
The thing that makes this method unique is that it uses a fine grind, a single pour and a short brew time. It sounds easy, but it can be surprisingly challenging to pull off.
Rather than doing the typical bloom phase, you start off pouring very slowly in circles from the center toward the outside. Then, you increase the speed to pour the rest of the water quickly in the same circular pattern. After the pour has finished, you swirl to get any grounds that stuck to the side and stir with a chopstick to increase the spin. Finally, you just let it drain.
Basic instructions:
- Grind 20g coffee to medium-fine size
- Heat water to your desired temperature 94C (200F) is a good starting point
- Rinse your filter paper and discard the rinse water
- Add coffee and use chopstick to make a small hole in center and stir outward
- Start the timer and start to slowly add water in the center
- Slowly pour in circles outward and slowly increase the pouring speed
- When you near the end, pour around the edge to get all the coffee
- After you’ve poured all your water, use chopstick to quickly stir in the center
Aim to finish pouring your water within 1 minute and for the brew to finish around 2 minutes. You can adjust your grind size to reach this time. A finer grind will slow it down and a coarser grind will speed it up.
Final thoughts on the Hario V60
If you made it this far, thank you! I know this is a long article for a single brewer, but hopefully you have found it helpful. As you get more into brewing coffee, you’ll be amazed by how you can alter the flavor by brewing it differently.
There really is no one perfect method because everyone has different preferences and every coffee tastes different. I recommend just starting with whatever method makes the most sense to you. Once you get the hang of it, you can either repeat it or a try a different one.
Happy brewing!